Custom Flame Painting – Tips and Tricks
Custom Flame Painting – Tips and Tricks
The below step by step shows you how I laid out a set of flames on a rear fender.
Sometimes I will start from one side and work my way to the other side. Other times I will start from the top and work to one side, then work to the other.
Below, I started at the top, then did the left side, then I move to the right side.
In this How-To, I used 1/16" tape which is harder to work with. You may want to try 1/8" fineline which is a little more forgiving. Your flames will end up being a little bit bigger, but at least you will have more control. Maybe you can buy 2 rolls of each and you can give the 1/16" a try first.

Basically what I do here, is mark the center line. I use the seat hole as a guide. Then I will add two pieces of fineline that will mark the start of the flames.

As you can see, I start with the inside of the flames. I then add a piece 3/4" tape to 'hold down' the oval portion of the flames.
I also added a couple of extra pieces of fineline to use as a guide in the next step. I also went ahead and removed quite a bit of the 'center' fineline, but left enough to still be able to use as a guide.

Here you can see I started doing the main top portion of the fenders. You can see this all works between the two original inner flames that I started with in the second pic. You can also see why I removed quite a bit of the center fineline guide as this would have been in the way. The fineline markers that cut through the oval portion of the flames will be used in the next step.

This is where I start from the top right side of the fender, and work my way down. I use the 'oval guides' on this step. It basically gives me a reference of what the 'other side' of the flame looks like. I try to get both halves of the same flame about the same. I also do this because I am laying the tape in a reverse direction, so I just use this as a reference as I am laying the tape. I also keep laying the flames continuing toward the strut area. You can see the one lick that I laid out that goes through the strut and will come out the bottom rear of the strut. I try to keep my flames away from the strut as much as possible, BUT, if I do go near it, I make sure it comes out somewhere behind or below it.

Now I do the same thing on the right side of the rear fender. You will see that short piece of fineline toward the second strut hole. This was put down BEFORE I got to this area. What I did is stood in front of the fender, looked on the left side of the rear fender (right side when standing in front), and I marked where the OTHER SIDE 'oval' ended up. This will give me a good reference of where this oval needs to end up being so it will come close to matching the other side. As you can see, I came within about an 1/8" which is perfect. You can do this with any portion of the flame. I usually do this to match up the ovals from one side to the other.

This is where I start adding some 3/4" tape to hold down the 'oval' portion of the flames.

Now I finish taping up the fender. We use the green tape in the center of the ovals as an indicator that we double checked this area. These areas are very susceptible to 'blow though' (this is where paint over spray goes between the pockets in the tape edges and gets on the surface of the paint)

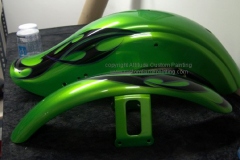
This is what the fender looks like all masked up. Some painters use a frisket type material to place over the fineline, then cut out the flames. We prefer the old fashioned way of doing this. We use 1/16" which is very thin to work with. This is harder to see though the frisket.
This method and 'tips' can be used on the other parts to help you layout your flames and 'guide' you to layout our flames.
Good Luck! Happy Flaming!


Comments